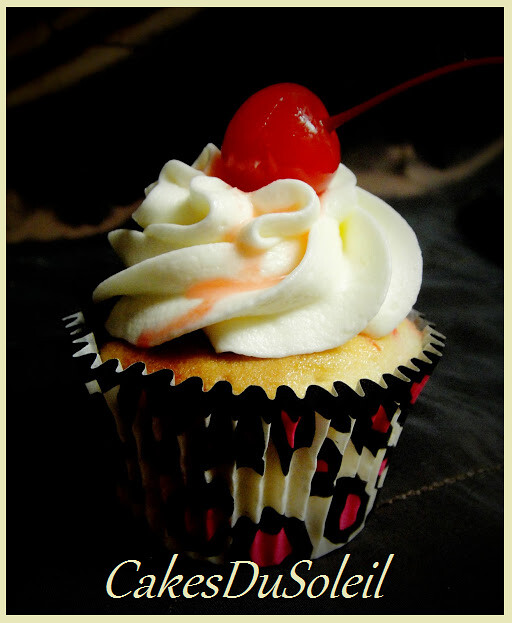
HAPPY VALENTINE'S DAY!

Cherry Almond Cupcake
Showing posts with label sugar art. Show all posts

Tuesday, February 28, 2023

How to make SugarPaste Butterflies


These little gumpaste butterflies make a lovely addition to a floral cake topper.
They are made on wire to easily insert into your topper.

Supplies

Gumpaste
Fondant Roller And Board
Cornstarch

Patchwork Cutters
#20 Covered Wire
Wire Cutters
Gum Glue
Edible Markers
Non Toxic Pastels

Instructions

Using wirecutters, cut wire into 6-8 inch lengths.
Roll out a small ball of firm gumpaste on a board, heavily dusted with cornstarch.


Roll thin, but not paper thin. Dust the Butterfly cutter with cornstarch. Press the patchwork cutter into the gumpaste, placing pressure on the edges of the cutter.


Pressing firmly on the cutter, move on board in a circular motion. Holding cutter in place, pull remaining gumpaste away.


Using a pin, loosen gumpaste from cutter. If butterfly should break in half at thorax, don’t worry, it will work just fine.


Roll a small amount of gumpaste into a 3/8” size ball. Moisten one end of wire with
gumglue, and insert into the ball. Press the gumpaste into wire, creating a ½” sausage on the end of the wire and brush with gum glue.


Place the gumpaste covered end of wire vertically over the center of the back side of gumpaste butterfly.


.

Fold the butterfly over the wire, gently folding the ends of wings to
create movement.


If thorax breaks off during process, make another by forming a thorax from a small sausage of gumpaste. Attach to the butterflies with gumglue


Place on a Styrofoam base to dry.
Once your butterfly has dried, use a colored marker
and paint a few sections of your butterfly.


With a black edible marker, outline the detail of the butterfly,


Repeat on back sides of wings.


Then finish by softening the shades, by coloring
the remainder butterfly using pastels. Gently rub
the pastel color in with a soft paper towel.


Insert wire into your cake topper. 

The butterfly can also be made without the wire
and attached to cake with gum glue.


Just have fun and use your creativity!


Photography and tutorial by Jacque Benson
All rights reserved 2009


Contents of this tutorial cannot be reproduced for
Commercial purposes without permission from author.


Friday, February 19, 2021

A Snowflake is Winter's Butterfly

I love that quote!

 In that spirit, I decided to make my own snowflakes out of  poured sugar- Isomalt- to be more specific.

The supplies I used were 1 cup of Isomalt crystals, a small saucepan, a rubber snowflake mold, a spoon, non-stick spray and a small bowl of ice water ( in case of burn injury!)

Isomalt is interesting. I had used it once before and learned quickly about its properities ( idiosyncrasies, if you will) at about 3am in the morning before a 9am scheduled cake delivery! Having waded through a barrage of mistakes, making the snowflakes on this go round was a bit easier.

I started by spraying a rubber snowflake mold ( the kind used to make maple candy ) with non-stick spray.
Then I dabbed the inside of the molds with a paper towel to make sure there was no puddling of the spray anywhere. This is important! Any pooling of the nonstick spray will literally sizzle and cook when you pour the Isomalt on it and you will have to discard your candy. I know this for a fact. :-(

Then I poured about a cup (or so- I didn't measure) of Isomalt into a stainless steel saucepan. I put my candy thermometer in place and, without adding water, began heating the crystals over low heat; stirring as it began to melt down.

Once melted, the sugar begans to heat quickly and before you even notice it is boiling, the candy thermomter will register 356 F or 180 C.

Isomalt heats very quickly. Do not turn your back on it. Do not blink!
However, it is more forgiving than sugar because it maintains its clear properties as it approaches the hard crack stage of cooking, whereas sugar turns a nice amber color.


Quickly remove from heat and with spoon, carefully ladle into the mold. Watch your hands as you do this to avoid burning yourself on the pan. ( Ask me how I know )

Wait until the candy snowflakes completely harden. Pull the mold away from the snowflakes.

 For more definition, I brushed some with SuperPearl edible dust or sprinkled with edible disco dust for sparkle.


There you have it. Easy Poured Sugar Snowflakes!
Let it snow, let it snow, let it snow!!

Saturday, September 1, 2012

Sugarpaste Silver Spurs ( a tutorial)


Gray colored firm gumpaste. This really needs to be a very firm paste.

Fondant roller


Gum Glue ( 1/4 tsp Tylose mixed with 1 tsbp hot water )

(for decorative use only)


Roll out gumpaste about 1/8"(*or a bit more) thickness on a well dusted board.( *A bit thicker is better

on the spurs to maintain stability during the drying process.)

Using wheel cutter, cut one using pattern. Flip pattern and cut one more.

Cut one spur using the daisy cutter.
***
Texture your spurs using a textured roller or impression mat. Or find something around your house that

would make an appropriate texture. In this case, I used an ivory cased carving set. It worked great to

make a western style impression.

In this photo, I used a textured rolling pin.

***

Cover the spurs with plastic wrap to protect from drying,

and paint the daisy using gold highlighter.


Uncover and turn the spurs over. Using the white colored portion
of your pattern as a guide, moisten the spurs with gumglue.

Place the daisy at the end and gently press the moistened spurs into the daisy.
Now press the spurs together as shown.

Position the circle cookie cutter on the top of a tall water glass.
Place the spur on the cutter ( as shown) to dry.
If your spurs want to slip, secure lightly with tape.
The firmer the gumpaste, the less likely to move or stretch.


When dry paint the spurs with silver highlighter luster dust and retouch the
daisy if necessary, then
spray with sugar lacquer to set the luster dust.

***
Spur Pattern Below

***


Tutorial and Photography by Jacque Benson
Copyright 2010
This material may not be reproduced without permission from the author.

Wednesday, August 10, 2011

Sugarpaste Belt Western Style

Belt Buckle Tutorial


Gray Colored Firm Gumpaste

Fondant Roller

Oval Cutter

Textured Roller, Impression Mat, or Stamp

Mini Texas Cutter

Gum Glue ( 1/4 tsp Tylose with 1 Tbsp hot Water)

Small bead mold

Gold and Silver Highlighter mixed with Everclear

Art Brushes

Script alphabet Tappits cutters ( opt)

Sugar Lacquer


Roll out gumpaste to about 1/8" thickness on a dusted board.
Cut out an oval using cutter  ( If you need a different size, make
an oval pattern and cut it out using a PME wheel cutter)
Texture your buckle with a textured roller, Impression mat, Stamp design
or with another impression you find around your house that will make
an appropriate design.

I used the impression from an Ivory Carving set
we use at Thanksgiving to carve the turkey!
Roll out a very thin piece of gumpaste. I used a mini Texas cutter, but
a star, longhorn, or a smaller oval cutter will work well too.

Moisten the back of the piece and attach to the center of the buckle.

Roll out a very thin cord of gumpaste and press into a small bead mold.
This one was a bead mold from First Impressions.
Attach to the edge of the buckle using gum glue.

Place on the side of a cake pan or dummy to dry completely.

Paint the buckle with silver highlighter and the contrasting
pattern piece with gold highlighter. If desired, you can contrast the
bead border with gold highlighter.

Spray with sugar lacquer.

If you want to monogram the buckle, use the Script Tappits to cut the
desired monogram. Moisten the back of the monogram with gumglue
and attach to the center of the buckle.

Paint with silver highlighter luster dust, then spray buckle again with lacquer.

Attach to your cake using piping gel or buttercream.

Be creative using different shapes, sizes, textures, cutters and borders to make a wide array of
western belt buckles!

Tutorial and Photography by Jacque Benson, copyright 2010
This material may not be copied without permission from the author.

Wednesday, March 24, 2010

Art Nouveau in Sugar


This last weekend, I was invited by my dear friend, Denise Talbot, to demonstrate
at an ICES Day of Sharing in Southeast Texas.
When I asked her what she wanted me to demo, she suggested, "What about a Jeweled Flower Topper? Jeweled flowers like on an antique brooch in the art nouveau style."


So I set about researching antique jewelry. After perusing antique stores and googling Antique Jewelry,
I found photos of beautiful floral brooches that were inspiring.

Now the trick was to take the 2 dimensional flowers and make them 3 dimensional for a cake topper.

It was a fun project and I had a great time demonstrating. I saw many old friends and met new friends too.
And for my cake buddies who cannot travel the distance, I thought I would share a few of the photos with you.


And here is the finished topper...


I will be making a step by step tutorial for the ICES newsletter, so stay tuned!

Monday, July 28, 2008

Tea Anyone?


What a busy and exciting month July has been. I just returned from
Florida where the ICES convention was held this year and I was invited
to demonstrate making sugarpaste teacups.


I talked with so many wonderful people and was excited to meet Kim Morrison, whose cake, featuring sugarpaste teacups, was the Grand Prize Winner in the National Wedding Cake Challenge in 2003! She was my first inspiration to make a teacup. Thank you Kim!


I believe the process for making these cup and saucer sets are fun and simple; and I encouraged every person who saw this demonstration at ICES to go home and make a set for themselves.
I was surprised and honored this morning when, Patrice, one of the creative owners of Serenatea, sent me a picture of her first teacup and saucer! What a beautiful work of art!

http://www.serenatea.com/

If you are interested in learning how to make these cups and saucers, here are the dates of upcoming workshops...


August 16, 2008 -SugarWonders Cake Club-Dallas, Tx http://www.sugarwonders.com/workshops.html


October 22, 2008- Frost-A-Tiers Cake Club-Houston, Tx


http://frostatiers.com/modules/content/index.php?id=16


"God gave us our memories so that we might have roses in December." ~J M Barrie