HAPPY VALENTINE'S DAY!

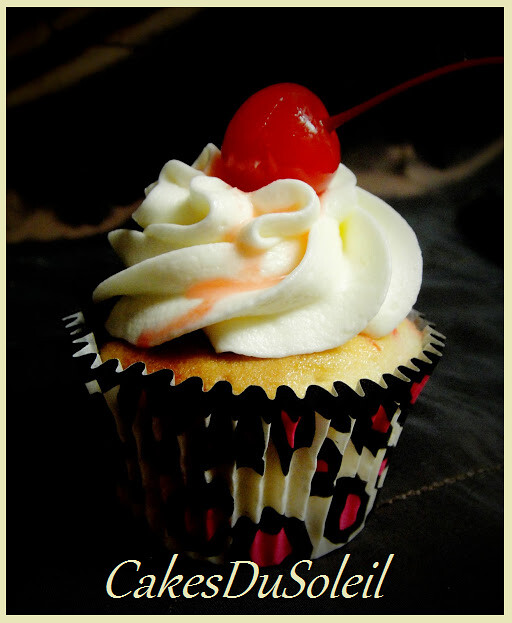
Cherry Almond Cupcake

Monday, April 25, 2011

Coloring Fondant to Deep Hues


One of the biggest challenges I had when I started working with fondant was how to get a deep red, blue or black.  I usually ended up with a big sticky mess, finally deciding to go to the cake supply store and buy the premade colored fondant.   Using a large amount of gel can change the consistency of your fondant.

Others who have tried using only powdered cake colors find it compromises the elasticisty of the fondant, making it unflexible and difficult to work with.

So I have found several ways to make a deep colored fondant...
I will show the different methods using different colors.

Let's start with the color

BLUE
This method is effective when you need a small amount of fondant for decorating.

Knead blue gel into your fondant until it is a nice robin's egg blue. Your fondant will be barely sticky. Once you find it becoming rather soft stop adding gel color.
Mix about 1/2 tsp blue candy/cake powdered food coloring with a tablespoon of confectioners sugar.
Knead into your fondant.  If you desire a deeper hue, sprinkle a small amount of color
on top and knead into your fondant until your fondant is desired color.

 Double wrap your fondant in plastic wrap and place in an airtight container. It will continue to
deepen in color as it sets.
***************************************
Here is a technique for making fondant


BLACK
This method is for achieving a deep black without a lot of mess. It will, however, taste like chocolate!

The easiest way to acheive a nice black fondant is to start with chocolate fondant.

 It is a very dark brown, so by the time you knead in black candy/cake powdered color you will have a nice dark black hue.

**********************************************
Here is another method to make a deep colored fondant.
I will demonstrate the color


RED
This method is effective when you desire a larger amount of fondant to cover an entire cake.

This  is an easy and tastier means to an end.
Make red candy clay using red candy melts.*
It is easy to make candy clay by mixing candy melts with white corn syrup.

Use around 2 parts white fondant to 1 part colored candy clay.

Knead your candy clay into your fondant.

Once your candy clay in incorporated into the fondant, you can deepen the color by adding powdered food color. Knead into the fondant. 

Keep adding powdered color until you achieve a deep red hue.
If your fondant is too soft, knead 1 tablespoon of confectioners sugar at a time until fondant is desired consistency.
Wrap with plastic wrap and place in an airtight container until ready to use.

 I used all three of these methods to color the fondant  used for myThomas the Train pictured below.


Try experimenting with different color candy melts, gels and powdered colors. The more
you practice, the easier it gets to get that dark rich color for your decorating needs.

*
CANDY CLAY RECIPE


1 lb Colored Candy Melts
1/3 cup light corn syrup
Melt Candy Melts following package directions. Stir in corn syrup and Blend will. Place mixture onto waxed paper and let set at room temperature until ready to use.  When ready to use,  knead candy clay until malleable before adding to fondant.


Tutorial and photography by Jacque Benson. copyright 2010 all rights reserved.
This material may not be reproduced without permission from the author.

Sunday, April 17, 2011

Flowering Cupcakes


Flowering Cupcakes

You will need:

5 plastic disposable piping bags with couplers
Piping tubes # 102, #104, #9, #66, #349
Rose, Moss green, Yellow, and Purple coloring pastes.
*Cupcakes
**Decorator Frosting

Remove 1 cup of icing and place in a separate bowl. Cover with plastic wrap.
Divide the remainder of icing into 4 equal parts into four separate bowls. Color each of them, using the pastes.
Cover each with plastic wrap to protect until ready to use.

Insert couplers into plastic piping bags.

Dip a bamboo stick or toothpick into the purple paste.  Make a 5”  line of color along the
sides of bag.  Fill bag about 1/3 full with purple icing. Place the #349 tip
on coupler and screw into place.
(1)
Dip a knife or spatula in rose paste and make a line down the center of bag. Fill bag ½ full with rose icing.  Use the #104 tip on this bag.

Fill the last three bags with white, yellow and green.
Use the #66 for green, #102 for white, #9 for yellow.

Wisteria


With the green icing, place the tip on the cupcake. Positioning bag at an angle, squeeze icing as you pull bag to create leaves at the perimeter of the cupcake.

With purple icing, place tip on the edge of cupcake. Positioning bag at an upward angle, squeeze and pull just as you did the leaves.

Continue process above the first row of petals, overlapping them, as shown.

This is the finished cupcake. One using the streaked bag technique, the other without.
________________________________________
Daisy
With white icing, place tip, with narrow side down, touching cupcake. Starting 1” from the edge, position bag at a high angle, squeezing and pulling into a “U” shape to create
daisy petals. Continue until one row of petals is complete.

Using same technique, start from ½” from center of cupcake and create the second row of petals, overlapping the first row.

With the yellow icing, place tip in the center and squeeze making a ball.

Using green icing, make a few leaves around the perimeter of the cupcake.
______________________________________

Rose

Using Rose icing, With cupcake in one hand and piping bag in the other, touch rounded end of tip to the center of cupcake.

With bag positioned at a slight angle,
turn the cupcake as you squeeze the icing making a cone.

Repeat this again over the top of cone overlapping the end, creating a center for the rose.

With tip at a vertical angle and bag horizontal, squeeze and pull a petal as shown.

Continue process around the cupcake, overlapping petals as you go.


Add Leaves using the green icing by inserting the tip just under the petal at the perimeter of the cupcake.

Remove tip, clean well, and change out piping tube on yellow icing. Make yellow rose
on top of cupcake using the same process shown above.
_______________________________________________________________
Recipes


* Strawberry Cupcake Recipe

1 Box Classic White Cake mix
½ cup water
½ cup vegetable oil
1 3oz box strawberry flavored gelatin
4 large eggs
½ cup crushed frozen strawberries

In a mixing bowl,  stir together Cake mix, water, oil and gelatin.  Beating with an electric mixer, add eggs. Beat 5 minutes and stir in strawberries. Blend well.
Ladle cake batter into cupcake cups placed in muffin tin.  Bake at 325 for 15-18 minutes.
It is ready when a toothpick inserted in the center of cupcake comes out clean.
Cool completely before decorating.

Strawberry Glaze (The glaze is optional, but I like the added layer of flavor it adds to the cupcakes)

2 ½ cups confectioner’s sugar
1 Tablespoon milk
3-4 Tablespoons crushed strawberries

In a bowl combine milk and sugar. Add strawberries, one tablespoon at a time until it becomes a thin consistency for glazing cupcakes.

**Cream Cheese Decorators Icing

1 8oz package cream cheese, room temperature
1 lb butter, room temperature
½ cup shortening
¼ cup hot water
¼ cup powdered coffee creamer
1 tsp vanilla
2 lbs 10x confectioners sugar
Pink, purple, moss green, and yellow coloring pastes

1. Using a standing electric mixer, cream together butter, shortening and cream cheese at medium speed.
2. Mix together hot water and powdered creamer.
3.  Add creamer mixture, one tablespoon at a time, to the butter/cream cheese.  Add vanilla. Mix together at lowest speed until incorporated, the increase mixer speed to med and whip for 30 seconds.
4.  With mixer at low speed, gradually add 1 lb of confectioner’s sugar.  Incorporate well, then gradually add remaining sugar. Icing should be a thick consistency for decorating.
If too thin, add more powdered sugar.

Tutorial and Photography by Jacque Benson
Copyright 2011
All rights reserved

This material may not be reproduced without permission from the author.
"God gave us our memories so that we might have roses in December." ~J M Barrie