HAPPY VALENTINE'S DAY!

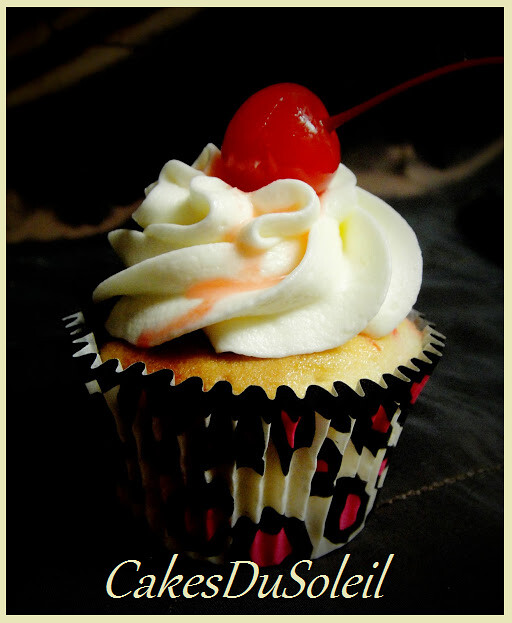
Cherry Almond Cupcake

Saturday, December 31, 2011

How To Make A Gumpaste Teacup

How to Make a Gumpaste Teacup
The process for making a gumpaste teacup is a simple one. Howevee, it does take some time; so if you need a teacup for a cake tomorrow, you may want to rethink your design. The gumpaste will be very fragile until completely dry, so allow yourself several days to complete the cup.
Supplies Needed:
Gumpaste
Paper Pattern
Fondant Roller and Mat
Cornstarch
PME cutter
Ball tool
Scissors
Palette knife
*Gum Glue
Brush for applying gum glue
China Cup for Molding
Instructions:
Method #1.
When using a china cup with an edge at the base, use the following instructions.
1.Start by using a cup with a large bowl. If your teacup has too steep of a slope, your gumpaste may
have a tendency to slide down. Measure the circumference of the top rim of the cup. Apply a liberal amount of cornstarch inside the cup. Set aside.
2. Cut a parchment paper pattern using the pattern guide above.
3. Dust your mat with cornstarch. Using a firm gumpaste, roll out until thin ( not paper thin, but so that you can see the shadow of your hand when you hold up to light).
Lay your pattern over the gumpaste, and cut along the lines of the pattern using your PME cutter. Lift to make sure your gumpaste does not stick to the board.
4. Dust the board again. Then applying pressing on the long curve of the fondant, began rolling to create more length. This is much like the process of sewing a flounce. Measure now to make sure that you have enough length to reach the circumference with a 3/8" overlap.
5. Lay one edge of the fondant in the cup lined up directly with the handle on the outside. Gently press the fondant into the cup.
Smooth the fondant into the cup and lay over the top edge. Secure the overlap with a light amount of gum glue. Using your PME cutter, cut the excess from the bottom edge of the cup, then smooth raw seam with a ball tool.
6. Cut most of the excess from the top of the cup using scissors. Carefully lift the gumpaste to assure it is not sticking to the cup. If it is, gently lift the gumpaste, apply more cornstarch and reset the gumpaste into the cup.
Using a palette knife, trim the edge of the gumpaste to the cup. Carefully lift the gumpaste again and set back into the cup to assure it is not sticking.
( This is an important step. If your gumpaste sticks to the cup, it will break when trying to remove it after it is dry. For the first couple of hours check to be sure it is not adhering to the cup. Be extremely careful with the edge of your gumpaste during this process)
Allow to dry completely. Once cured, you can handle the cup without fear of it breaking easily.

7. When your cup is dry, roll out 1/4" cornstarch on your board. Lightly brush the bottom edge of your cup with gumglue. Press into the gumpaste.
Pick up, turn over and gently trim excess gumpaste with your palette knife.
Smooth inside of bottom using your ball tool.
Once dry, you can spackle any imperfections with royal icing if you like.


**~~~~~~~~~~~~~~~~~~**
Method #2
If you are using a cup with a bowl and no edge where the inside of the cup meets the bottom, you will use this method.
1. Begin by generously applying cornstarch to your cup and board.
2. Roll the gumpaste out very thin in a large circle.
3. Lay over the cup and gently begin smoothing gumpaste into the cup. Don't hurry this process or you will get a crease at the edge.
If your gumpaste doesn't meet the bottom, don't fret.
Gently smooth the gumpaste toward the bottom of the cup and
it will eventually rest into the cup.

4. Cut the edge of the gumpaste with scissors, gently lift away from the cup, then set back in. Using your palette knife, trim the gumpaste to the edge of the cup.
Gently lift the gumpaste to assure it is not sticking to the cup and lay back inside.

Allow to dry completely.

5.When dry. Roll out a 1/4" sausage of gumpaste about 3 inches long. Moisten one edge with glue, the press edges together, creating a 1" circle.
6. Moisten top edge of circle with gumglue and set the cup on top to create the base of your cup.
Use the small edge of your ball tool to make the base of the cup concave if you like.
7. Check to be sure your cup is setting level, then leave upside down to dry completly.

Making and Applying the Handle


8. While your cup is drying, make a handle using the pattern as a guide, or you can create your own handle design. Lay in a cornstarch bath to dry.

9. Mix a very small amount of gumpaste with your gum glue to make a soft paste. Using this paste, attach the handle to the cup.
10. Set aside and allow to dry completely. When dry, you can decorate your cup using petal dust mixed with everclear.

* to make gumglue mix 1/4t Tylose with about 2 T. hot water. Keep in a small sealed container.


Mostly just have fun with it.... Remember-- sugar is supposed to be fun!!
*************************************
Photos and Tutorial by Jacque Benson 2007 all rights reserved.
The tutorial or patterns cannot be reproduced for commercial purposes without
permission from the author.

Sunday, December 4, 2011

Key Lime Cookie Christmas Tree


Key Lime Cookie Tree


Ingredients and Supplies
Cookies
·                        1 cup butter (no substitutes)
·                        1/2 cup sugar
·                        1/4 cup Nellie and Joes’ key lime juice
·                        1 teaspoon vanilla
·                        2 1/4 cup all-purpose flour
·                        ¼  cup confectioner’s sugar
                     
Icing
·                       2 tablespoon meringue powder
·                        1/4 cup warm water  + 2 tablespoons key lime juice
·                        3 cups sifted powdered sugar
·                        1 teaspoon vanilla
·                        1/4 teaspoon cream of tartar
·                        1 - 2 colors assorted paste food coloring- mint green, teal, aqua


Supplies
                         Rolling Pin
·                        Parchment Paper
·                        2” and 1” leaf cookie cutters
·                        Thin bamboo skewers, cut to 3” lengths
·                        Tooth picks
·                        Piping bags
·                        #2 or #3 piping tip
·                        Glue
·                        6 inch Styrofoam cone 
                         6-8” plastic plate or covered cardboard cake circle
·                        Small needlenose craft pliers
·                        Confectioner’s Sugar for decorating
                         Silver and/or Gold dragees (optional)
·                        White Sparkle gel
                          Star shaped lollipop

Directions
                               1. Beat butter with an electric mixer on medium speed for 30 seconds. Beat in sugar until combined. Beat key lime juice, and 1 teaspoon vanilla. Beat in as much flour as you can with the mixer. Stir in remaining flour with a wooden spoon. Divide dough in half. Cover and chill 1 hour or overnight until easy to handle.
                              2. Sprinkle Parchment paper with confectioner’s sugar. Roll each portion of dough on a lightly dusted surface until 1/4-inch thick. Cut out using floured light leaf-shape cookie cutters. Lift away unused cookie dough, wrapping in plastic wrap and place back in refrigerator to cool.  Insert bamboo skewer into larger leaf cookies, and toothpick into center of small leaf cookies. 
 (If skewer is exposed, pinch dough up arount the skewer to cover, then place that side down on the parchment paper. Place the parchment with cookies on an ungreased cookie sheet.

                              3. Bake in a 350 degree F oven for 8 to 10 minutes or until light brown around edges. Transfer cookies to wire racks to cool. Allow to cool completely before icing the leaves.

                             4. For icing: combine meringue powder, warm water, key lime juice, powdered sugar, 1 teaspoon vanilla, and cream of tartar in a large mixing bowl. Beat with an electric mixer on low speed until combined, then on high speed for 7 to 10 minutes or until smooth and of spreading consistency. Divide into portions and color with aqua, teal, and mint green  paste food coloring. Use at once to frost cookies.

                             5. Fill piping bag with icings and pipe a Line around the edge of each cookie.


When finished, thin remaining icing with water until proper consistency for flooding cookies

 Icing is ready to fill  in outlines when a small amount dropped  
from a spoon into the mixture disappears on the count of ten..

  Place on racks until set.
 
                               6. Glue Styrofoam cone onto a plastic  plate or covered cake circle. ( I inverted a clear plastic plate purchased from the dollar store.) Sprinkle confectioner’s sugar onto the cone.

                              7.  Starting at the bottom, carefully push the larger cookies into the Styrofoam cone using a pair of small needlenose craft pliers on skewers and toothpickes. Do not push on cookies as they will break. 

Continue adding cookies , using large cookies at bottom, then adding smaller cookies toward the top of cone. Use leftover small leaf cookies to fill in gaps on lower part of cone.

                              8. To decorate the tree, run a small line of sparkle gel around the tips of cookies to resemble icicles.  Place dragees on the tips of leaves. The sparkle gel will hold the dragees in place. Sprinkle the tree with confectioners sugar to resemble snow. Cut stem of lollipop to 2” and place the star lollipop on top of the tree by inserting stem into upper tip of cone.


 Tutorial and photography by Jacque Benson
All rights reserved 2011

Recipe inspired and adapted from

Thursday, November 3, 2011

Victorian Style Gilded Gumpaste Fruit


Victorian style Gilded Gumpaste Fruit

Supplies

Firm Gumpaste

Green Royal Icing in Piping Bag

Cornstarch

Red, Green, Orange and Brown Gel Colors

Gold, Silver, Champagne, Copper, Super Pearl luster dusts

Gum Glue

Assorted Plastic Fruit

PME cutter or Pizza cutter

Scissors

Wire cutters

Everclear

Brushes

32 gauge wire

28 gauge white covered wire

White floral tape


__________________________________________

Pine Boughs


Cut 32 gauge wire into 3-1/2” lengths.

 Place together 8 wires and wrap the middle with floral tape.

Spread the wires at the ends.


Insert each wired end into the tip of the piping bag and withdraw gently.

Set aside to dry.

When dry, fold the ends together and set aside.

__________________________________________________-

Grapes


Cut 28 gauge covered wire into 3” lengths.

Make a hook at the end of each wire.

Roll a ½” oblong ball of gumpaste.

Moisten the hook end of the wire with gum glue;

insert into the end of gumpaste grape and turn a quarter turn to secure.

Pinch and smooth the end of the grape to the wire.
Set aside to dry.


Twist together the grapes in groups of three.

Wrap 3-4 grape clusters together with white floral tape.

Paint grapes with Super Pearl mixed with everclear,

then brush ends with gold luster dust.
___________________________________________________


Gilded Fruit


Color your gumpaste to match your fruit.

Orange for oranges, red for apples, green for pears, ect.


Liberally dust one side of plastic fruit with cornstarch.'

Roll out gumpaste on a well dusted board into a circle about 1/8” thickness.

Dust underside of gumpaste well with cornstarch.

Lay over one side of plastic fruit,
smoothing to fit over half.

Using your PME or Pizza Cutter, cut in a straight line on the half of fruit.


Lift gumpaste to make sure it isn't sticking and lay back on fruit to dry.

When dry, Mix your gold, silver and champagne luster dusts with everclear
and paint onto fruit.

Steam fruit to set in the color.

Attach to cake using white royal icing piped around the edge.

__________________________________________

Gilded Pinecone

Color Gumpaste brown, and roll into a 1” oblong ball.


Placing scissors at a 90 degree angle, snip V shaped using the very end of your scissor blades.

Repeat the process just under the first row,
alternating the cuts to create the pinecone seeds.

Continue the process until the cone is cut all way to the end.


Using a small spatula or knife,
make a vertical indention on the middle of each seed.

Set aside to dry.

Mix copper lusterdust with everclear, and lightly paint the pincone.

Steam to set in color.

Attach to cake using white royal icing.

 
For more flair and interest, add pearlized gumpaste green leaves, gumpaste pink roses, and pearlized gumpaste feathers to your guilded fruit groupings.


********


Tutorial by Jacque Benson 2008-all rights reserved
Photography by Morgan Jackson 2008-all rights reserved
Tutorials and photos may not be reproduced in any form
without permission.

Monday, October 17, 2011

HAPPY HALLOWEEN!


Witches, pumpkin heads,


and black cats,


Scary spooks and black bats,


Oh it's Halloween!


Halloween's the night


You dress up like a sight


To give your friends a fright


Look out, it's Halloween!


Halloween night is the night


When fearful things are seen


Look out! Look out!


It's Halloween !!!
"God gave us our memories so that we might have roses in December." ~J M Barrie