HAPPY VALENTINE'S DAY!

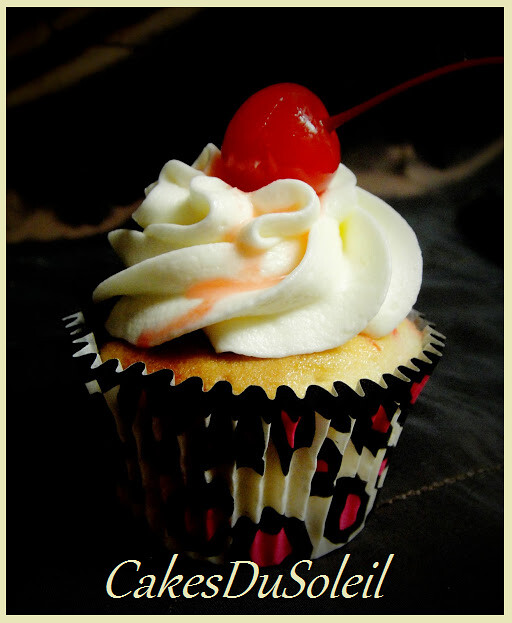
Cherry Almond Cupcake
Showing posts with label christmas cookies. cakesdusoleil. Show all posts

Tuesday, December 5, 2023

Making a Sugar Christmas tree


Supplies :


Waffle Cones for Ice cream

Small bowl with 1/2 inch water

scissors

Forest Green Royal Icing

Piping bag with #67
Piping tip

Yellow colored Gumpaste

3/4" Five petal or Star Cutter

Gumglue or piping gel

Wilton Pastel Candies
Dragees


Place two waffle cones together as shown.


Place in shallow water for 15- 20 seconds.


Remove from water and, using scissors, cut away soft edge of cone

until bottom edge is even and level.


Using royal icing, attach the cones to make "trees".

Starting at bottom of tree, begin piping leaves pulling out as you pipe.

Continue until you have filled the tree with "fir branches", leaving about 3/4" at top bare so you can move your tree into place. When the tree is placed where you want it on your cake or board, you can fill in the remainder of the top of the tree.

Roll out yellow gumpaste to about 1/4" thickness and cut out a star using your cutter. Place a yellow pastel candy on both sides of star, using gumglue or piping gel. Place on top of tree and secure with royal icing. Hold in place until firmly set.

Decorate your tree with colored pastels and dragees, securing with fresh royal icing if needed.


Photography and Tutorial by Jacque Benson
2009 copyright all rights reserved

Saturday, April 19, 2014

Here comes Peter Cottontail!


I just wanted to share a very quick and cute way to have fun on a sweet Easter Sunday!   Just so you know how fast this project is, I sent my husband out to pick up grilled chicken a few miles away, and by the time he got back, the chocolate egg was out of the mold, the bunny was finished and salads were made!  

Here's what you will need. 

White Chocolate fondant :
2" ball of white
1" ball of electric yellow
1" ball of neon pink
1" ball of neon green

1/2 cup white chocolate melts
 A few Pastels
Shortening for rolling out fondant
Malted Milk eggs or favorite candy


Tools:

Toothpick
gum glue
Paintbrush
Fondant Roller
Fondant Board
Blossom Cutters
Leaf Cutter 
Blue or Black edible pen
Cotton gloves for handling chocolate

Start by rubbing your fondant board lightly with shortening.

Roll two very small balls, 3/8" and 1/4".


Press flat into mold, as shown.


Roll out pink fondant on lightly greased board. Cut two small blossoms, using your cutters.


Place over yellow centers in mold. Gently press the petals into the mold.
When you turn it over, it should look like this.

Roll a narrow green cord about 4" long from the green fondant.


Cut in half and press into back of flower, then shape into stems, pressing the stems gently into the mold.

Roll out green on lightly greased board and cut a leaf.

 Place on stem, gently pressing into the mold.


When turned over, it should look like this.
 Set aside.

In the microwave, melt the white chocolate in a heat safe measuring cup, for about 2 minutes at med power.
Remove from microwave, and stir until chocolate is melted and smooth.

Spoon into molds, tilting to coat the sides,
continuing to rotate the mold slightly to cover the sides with a nice thick layer of chocolate.
 If some spills over the edge,
just scrape off with the flat side of a spatula.

Place in the freezer. 

While the chocolate is in the freezer, 
Divide the white chocolate fondant into two equal pieces. 
Form one into an oblong shape slightly larger on one side, as shown.

Clip the sides to create arms, and clip 1/2" into the center of the bottom to create legs, 
as shown below.
 

Gently roll the arms and legs to create a body.
Clip off ends of arms and set those pieces aside for later use.

Make feet and hands by shaping the rolled ends of the fondant.
Place the body in a sitting position and set aside.

Take the second ball of white fondant and make another oblong shape,
 as shown below.

 Clip the center of the narrow edge, as shown to create ears

Flatten the ears.
Roll out a small amount of pink and place in the center of the ears.
Attach with gum glue, if necessary.


Break a toothpick in half and place into body, with a portion extending above the neckline.
Moisten bottom of head with gum glue and push into the toothpick to secure to the body.

Add pink to the bottoms of the feet, (as shown below)
and buttons on the front of bunny, if desired.

Roll out two tiny balls with the reserved white fondant, and a smaller pink ball. 
Attach to the face to create the bunny's nose and mouth.
And don't forget to save a little white for a tail!
Using an edible pen, make two dots for eyes.

Reheat the leftover chocolate in the measuring cup.
(being careful not to burn it, 30 seconds, med power should be plenty, but keep a watchful eye)
Okay, now using the artist brush, dip into chocolate
and brush a little onto on side of the pastels to attach to the bunny.

 We don't want our Easter Bunny empty handed! 

If you cannot find pastels, just  use 1/4" edible pearls, candies or rolled fondant. 
Okay, Bunny is finished!!
 The chocolate eggs should be set up.
Remove from freezer and set mold side up.
 Allow the eggs and base to loosen.
They should fall right out of the mold.
How cute is that?

Use cotton gloves to prevent fingerprints.
Turn the flat sided egg upright and fill it with candy.

Gently brush melted chocolate along the edge of the egg,
 then gently afix the decorated side of the egg on top.  

Brush a little melted chocolate over the seam,
 then add the butterflies to cover the seam.
Brush a little chocolate on the top of the base,
 then set the egg on top of the base.
Place the bunny on top of the egg.
 And add a little butterfly to his foot,
just because it's spring!

There you go...
Peter Cottontail with lots of sweet treats!
Bunny-licious!


  Happy Easter!


Tutorial and Photography by Jacque Benson
2014 all rights reserved.


Saturday, December 31, 2011

How To Make A Gumpaste Teacup

How to Make a Gumpaste Teacup
The process for making a gumpaste teacup is a simple one. Howevee, it does take some time; so if you need a teacup for a cake tomorrow, you may want to rethink your design. The gumpaste will be very fragile until completely dry, so allow yourself several days to complete the cup.
Supplies Needed:
Gumpaste
Paper Pattern
Fondant Roller and Mat
Cornstarch
PME cutter
Ball tool
Scissors
Palette knife
*Gum Glue
Brush for applying gum glue
China Cup for Molding
Instructions:
Method #1.
When using a china cup with an edge at the base, use the following instructions.
1.Start by using a cup with a large bowl. If your teacup has too steep of a slope, your gumpaste may
have a tendency to slide down. Measure the circumference of the top rim of the cup. Apply a liberal amount of cornstarch inside the cup. Set aside.
2. Cut a parchment paper pattern using the pattern guide above.
3. Dust your mat with cornstarch. Using a firm gumpaste, roll out until thin ( not paper thin, but so that you can see the shadow of your hand when you hold up to light).
Lay your pattern over the gumpaste, and cut along the lines of the pattern using your PME cutter. Lift to make sure your gumpaste does not stick to the board.
4. Dust the board again. Then applying pressing on the long curve of the fondant, began rolling to create more length. This is much like the process of sewing a flounce. Measure now to make sure that you have enough length to reach the circumference with a 3/8" overlap.
5. Lay one edge of the fondant in the cup lined up directly with the handle on the outside. Gently press the fondant into the cup.
Smooth the fondant into the cup and lay over the top edge. Secure the overlap with a light amount of gum glue. Using your PME cutter, cut the excess from the bottom edge of the cup, then smooth raw seam with a ball tool.
6. Cut most of the excess from the top of the cup using scissors. Carefully lift the gumpaste to assure it is not sticking to the cup. If it is, gently lift the gumpaste, apply more cornstarch and reset the gumpaste into the cup.
Using a palette knife, trim the edge of the gumpaste to the cup. Carefully lift the gumpaste again and set back into the cup to assure it is not sticking.
( This is an important step. If your gumpaste sticks to the cup, it will break when trying to remove it after it is dry. For the first couple of hours check to be sure it is not adhering to the cup. Be extremely careful with the edge of your gumpaste during this process)
Allow to dry completely. Once cured, you can handle the cup without fear of it breaking easily.

7. When your cup is dry, roll out 1/4" cornstarch on your board. Lightly brush the bottom edge of your cup with gumglue. Press into the gumpaste.
Pick up, turn over and gently trim excess gumpaste with your palette knife.
Smooth inside of bottom using your ball tool.
Once dry, you can spackle any imperfections with royal icing if you like.


**~~~~~~~~~~~~~~~~~~**
Method #2
If you are using a cup with a bowl and no edge where the inside of the cup meets the bottom, you will use this method.
1. Begin by generously applying cornstarch to your cup and board.
2. Roll the gumpaste out very thin in a large circle.
3. Lay over the cup and gently begin smoothing gumpaste into the cup. Don't hurry this process or you will get a crease at the edge.
If your gumpaste doesn't meet the bottom, don't fret.
Gently smooth the gumpaste toward the bottom of the cup and
it will eventually rest into the cup.

4. Cut the edge of the gumpaste with scissors, gently lift away from the cup, then set back in. Using your palette knife, trim the gumpaste to the edge of the cup.
Gently lift the gumpaste to assure it is not sticking to the cup and lay back inside.

Allow to dry completely.

5.When dry. Roll out a 1/4" sausage of gumpaste about 3 inches long. Moisten one edge with glue, the press edges together, creating a 1" circle.
6. Moisten top edge of circle with gumglue and set the cup on top to create the base of your cup.
Use the small edge of your ball tool to make the base of the cup concave if you like.
7. Check to be sure your cup is setting level, then leave upside down to dry completly.

Making and Applying the Handle


8. While your cup is drying, make a handle using the pattern as a guide, or you can create your own handle design. Lay in a cornstarch bath to dry.

9. Mix a very small amount of gumpaste with your gum glue to make a soft paste. Using this paste, attach the handle to the cup.
10. Set aside and allow to dry completely. When dry, you can decorate your cup using petal dust mixed with everclear.

* to make gumglue mix 1/4t Tylose with about 2 T. hot water. Keep in a small sealed container.


Mostly just have fun with it.... Remember-- sugar is supposed to be fun!!
*************************************
Photos and Tutorial by Jacque Benson 2007 all rights reserved.
The tutorial or patterns cannot be reproduced for commercial purposes without
permission from the author.

"God gave us our memories so that we might have roses in December." ~J M Barrie