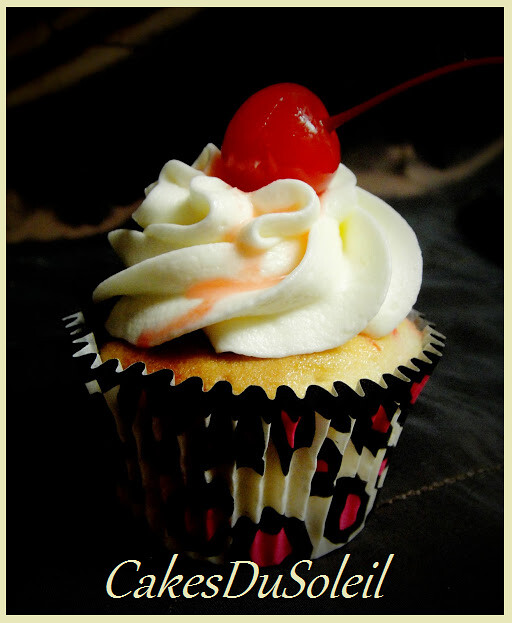
HAPPY VALENTINE'S DAY!

Cherry Almond Cupcake
Showing posts with label Cupcakes. Show all posts

Monday, October 22, 2018

Spooktacular Halloween Cupcakes


How fun is Halloween. This year, I would like to
share the step by step instructions to create
Fun and Spooky Cupcakes!


You will need:

2 dozen of your favorite cupcakes, baked and iced
Airbrush
Avocado, Violet, Orange
White and Black Confectioner's Melts
#8,#4 Piping Tips

I used a half recipe and have some left over.

(Be sure to Check out A&H CakeDesign for
Americolors, PME tools and Ateco Cutters.)


 Melt 1/2 cup white confectioner's melts. Pour into a plastic piping bag and
cut off tip. On Parchment paper, pipe 8 lines intersecting in the center, as shown above.


Connect the lines, creating a "spider web".  You will need two dozen webs.
Make extra to allow for breakage. These are easier to handle if piped in heavier lines.

Allow to set and carefully lift off parchment paper with a thin spatula.

 With remaining white chocolate, fill 8 egg cups.
Allow to harden then pop out of mold and set aside.


Wash and dry chocolate mold.
Melt 1/2 cup black confectioners melts and fill 16 cups.
Allow to harden and set aside.

 Roll out white candy clay on surface dusted with confectioner's sugar.
Using 3" circle cutter, cut 8 circles.
 Stand white egg on end and drape the 3" circle over it, creating
a ghost's body.
 Set aside and allow to firm.
 Using the black candy clay, roll out between sheets of wax paper
Cut a 1-1/2" wingspan using the PME wheel cutter.
Make 8 batwings
These do not need to be perfect. In fact the presentation
is much cuter if they all are a bit different.
Place 8 eggs, narrow end up, over the wings and allow to firm.
They should attach to the chocolate, but if they are difficult, you
can use melted chocolate to attach.

Using the 1" circle cutter, cut 8 circles.
Using the large end of your piping tube, cut 8 circles.
Score the wings, as shown above. ( Please forgive the blurry photo!)
Then cut down the center, creating a set of wings.
Place on the sides of  8 black egg, narrow end down.
Set aside.
Using the large end of your piping tube, cut a curve from both
sides of the 1/2" circles.
Cut in half, as shown, using the PME wheel cutter.
These will serve as ears to the bats and owls.
Set the ears in place.
Roll out white and black
candy clay somewhat thin.
Using the end of the #8 piping tube
Cut 16 circles for the owls eyes.
Then cut 16 pupils using the end of the #4 piping
tube as your cutter.
Place the black pupils on the white eyes
and set in place on the top side of the owl.
Cut 8 more circles using the #8 piping tube as the cutter.
Cut evenly in half and place, as shown, to create eyes for the bat.


Cut 16 Black circles using the #8 piping tube.
Set in place on ghost, as shown.
Spray 8 each of the cupcakes in purple, orange and green.
Carefully place the spider webs in place. Expect breakage.
Then set the owl, ghostie, and bat on top of the cupcakes.

Now go PARTAY!!
HAPPY HALLOWEEN!!


Tutorial and Photography by Jacque Benson
All Rights Reserved 2010
This material may not be reproduced without
permission from the author.

Sunday, April 17, 2011

Flowering Cupcakes


Flowering Cupcakes

You will need:

5 plastic disposable piping bags with couplers
Piping tubes # 102, #104, #9, #66, #349
Rose, Moss green, Yellow, and Purple coloring pastes.
*Cupcakes
**Decorator Frosting

Remove 1 cup of icing and place in a separate bowl. Cover with plastic wrap.
Divide the remainder of icing into 4 equal parts into four separate bowls. Color each of them, using the pastes.
Cover each with plastic wrap to protect until ready to use.

Insert couplers into plastic piping bags.

Dip a bamboo stick or toothpick into the purple paste.  Make a 5”  line of color along the
sides of bag.  Fill bag about 1/3 full with purple icing. Place the #349 tip
on coupler and screw into place.
(1)
Dip a knife or spatula in rose paste and make a line down the center of bag. Fill bag ½ full with rose icing.  Use the #104 tip on this bag.

Fill the last three bags with white, yellow and green.
Use the #66 for green, #102 for white, #9 for yellow.

Wisteria


With the green icing, place the tip on the cupcake. Positioning bag at an angle, squeeze icing as you pull bag to create leaves at the perimeter of the cupcake.

With purple icing, place tip on the edge of cupcake. Positioning bag at an upward angle, squeeze and pull just as you did the leaves.

Continue process above the first row of petals, overlapping them, as shown.

This is the finished cupcake. One using the streaked bag technique, the other without.
________________________________________
Daisy
With white icing, place tip, with narrow side down, touching cupcake. Starting 1” from the edge, position bag at a high angle, squeezing and pulling into a “U” shape to create
daisy petals. Continue until one row of petals is complete.

Using same technique, start from ½” from center of cupcake and create the second row of petals, overlapping the first row.

With the yellow icing, place tip in the center and squeeze making a ball.

Using green icing, make a few leaves around the perimeter of the cupcake.
______________________________________

Rose

Using Rose icing, With cupcake in one hand and piping bag in the other, touch rounded end of tip to the center of cupcake.

With bag positioned at a slight angle,
turn the cupcake as you squeeze the icing making a cone.

Repeat this again over the top of cone overlapping the end, creating a center for the rose.

With tip at a vertical angle and bag horizontal, squeeze and pull a petal as shown.

Continue process around the cupcake, overlapping petals as you go.


Add Leaves using the green icing by inserting the tip just under the petal at the perimeter of the cupcake.

Remove tip, clean well, and change out piping tube on yellow icing. Make yellow rose
on top of cupcake using the same process shown above.
_______________________________________________________________
Recipes


* Strawberry Cupcake Recipe

1 Box Classic White Cake mix
½ cup water
½ cup vegetable oil
1 3oz box strawberry flavored gelatin
4 large eggs
½ cup crushed frozen strawberries

In a mixing bowl,  stir together Cake mix, water, oil and gelatin.  Beating with an electric mixer, add eggs. Beat 5 minutes and stir in strawberries. Blend well.
Ladle cake batter into cupcake cups placed in muffin tin.  Bake at 325 for 15-18 minutes.
It is ready when a toothpick inserted in the center of cupcake comes out clean.
Cool completely before decorating.

Strawberry Glaze (The glaze is optional, but I like the added layer of flavor it adds to the cupcakes)

2 ½ cups confectioner’s sugar
1 Tablespoon milk
3-4 Tablespoons crushed strawberries

In a bowl combine milk and sugar. Add strawberries, one tablespoon at a time until it becomes a thin consistency for glazing cupcakes.

**Cream Cheese Decorators Icing

1 8oz package cream cheese, room temperature
1 lb butter, room temperature
½ cup shortening
¼ cup hot water
¼ cup powdered coffee creamer
1 tsp vanilla
2 lbs 10x confectioners sugar
Pink, purple, moss green, and yellow coloring pastes

1. Using a standing electric mixer, cream together butter, shortening and cream cheese at medium speed.
2. Mix together hot water and powdered creamer.
3.  Add creamer mixture, one tablespoon at a time, to the butter/cream cheese.  Add vanilla. Mix together at lowest speed until incorporated, the increase mixer speed to med and whip for 30 seconds.
4.  With mixer at low speed, gradually add 1 lb of confectioner’s sugar.  Incorporate well, then gradually add remaining sugar. Icing should be a thick consistency for decorating.
If too thin, add more powdered sugar.

Tutorial and Photography by Jacque Benson
Copyright 2011
All rights reserved

This material may not be reproduced without permission from the author.
"God gave us our memories so that we might have roses in December." ~J M Barrie