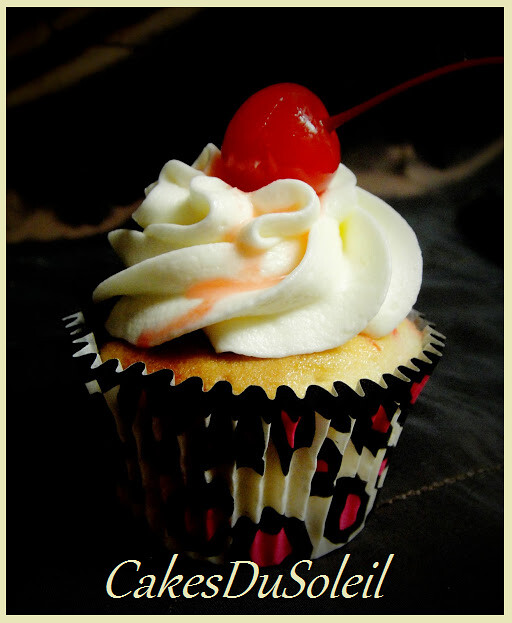
HAPPY VALENTINE'S DAY!

Cherry Almond Cupcake

Saturday, December 5, 2020

Gingerbread House Baking Tips

This is the first in a series of three Gingerbread House Tutorials.
Here are a few baking tips for your Gingerbread, along with a few patterns for your convenience.


Gingerbread House Recipe
  • 1/3 cup soft shortening
  • 1cup brown sugar, packed
  • 1-1/2 cups dark molasses
  • 2/3 cup cold water
  • 7 cups flour
  • 2 tsps. Baking soda
  • 1 tsp. salt
  • 1 tsp. allspice
  • 1 tsp. ginger
  • 1 tsp. ground cloves
  • 1 tsp. cinnamon

Mix shortening, brown sugar, and molasses thoroughly.
 Stir in water, Blend all dry ingredients; stir in. Chill dough.

A few tips for rolling out gingerbread:
Once your dough is chilled, it is easier to manage.
Cut dough in half.
Cut parchment to fit an 10X15” jellyroll pan.
 Spray pan and paper with a light coat of nonstick spray.
Form dough into a rectangle, then roll out on a floured silicone mat.
Roll with equal pressure from the center of the dough to the ends.
Flip the rolled dough onto the paper lined jellyroll pan;
Make a 10X15 solid cookie by rolling the dough to 1/8” thickness. 


Place your pattern on the dough and score with a pizza cutter.
Keep your cutter clean while working.

After tracing pattern pieces, leave all dough in place
 to prevent dough from spreading or changing shape while baking.


For the porch pillars, just roll out dough into two 1/2" diameter logs.


Using a toothpick, score a light indention or two on the logs to create a bit of interest.

Preheat oven to 350 degrees.
Bake gingerbread  7-8 minute just until edges begin to brown slightly.
Remove from oven and and lightly roll hot gingerbread to flatten our any humps from baking.

Re-score on scored lines while gingerbread is still  quite warm

Work quickly and carefully.
If the dough cools too much the pieces will crack, however dough can easily be cut while hot.

Nest carefully place the parchment paper with the scored gingerbread onto a baking rack to cool completely.

When cooled, remove from the parchment paper and allow the bread to set for a 24 hour period to harden. 
Allow to harden at least one day before attempting to piece house together.

 ***
 Below are a few patterns just to get you started.
Cut your patterns from cardboard or foam core and assemble with tape beforehand, especially if you are adding
elements to your structure, such as a porch, vestibule, gables or any other addition you want to create.

This step makes it easier to envision your assembly when constructing with gingerbread and sugar and well worth the extra time.
If you label your cardboard pieces, you will find it much easier to identify how your pattern should be placed.

Be creative and have fun!

PATTERNS


 Gingerbread recipe shared from ICES, New Mexico chapter.

Friday, October 23, 2020

Cake Ball Punkin Patch

How does that poem go?

When the frost on the pumpkin lies... or when on the counter the cake scraps lie?


You know what I'm talking about!

So what to do you with all those cake scraps?
Make cake balls, of course.

Don't tell anyone, but I actually made some petit fors that looked SO bad after I iced them, I threw them into a bowl and took out my frustration on them, beating them into submission...and that's how my punkin patch got started.


Oh, don't act like you've never wanted to do that!


 You know you have!


And I hate to just throw away scraps.
So, in addition to the orange petite for disasters, I made a batch of chocolate using the leftover scraps from a cake I leveled.

 So if you want to make some "punkins", just crumble cake scraps into a bowl.
Now at this point, you can add different things to make the crumbs adhere. 

To 2 cups cake crumbs,
you can add 
3/4 to 1 cup 
of Buttercream icing,
OR cream cheese, 
OR (my personal favorite) chocolate ganache!
 
Start with a half cup, then add the binding agent until you have a nice soft paste, you can add more
if you like. That is entirely a personal preference. 
The softer the mixture, the longer you will need to chill them before dipping the cake balls.


 Chill that mixture for a few hours, then, using a melon baller, just scoop them out, 
roll them into a ball and place on waxed paper.


For  pumpkins, score the cake balls, using a toothpick, as shown.


Cover them with plastic wrap and placed them in the freezer for at least an hour, or overnight. 

Melt 8 oz orange confectionery melts in a chocolate warmer or over a double boiler.
Add paramount crystals, a tablespoon at a time, to thin until it becomes a nice dipping consistency.
If you are making a lot, then try dipping half in white confectionery melts  for contrast.


Insert a toothpick into cake ball and dip into prepared confectionery melt, and remove quickly, allowing excess coating to fall back into pan.


If desired, dip in autumn leaves sprinkles, ground nuts, or even finely ground cake or cookie crumbs directly after insertion.  Remove toothpick. Don't worry about the hole or cracking. You are going to cover that up anyway. 


They don't have to be perfect. 
I have yet to find a pumpkin that is perfect when choosing one to carve!!!

Easy so far? It really is!!

Once the coating is set, you can brush on some edible luster dust for a little gilding.


For the final step, you will need icing tips  #2,# 4, and a leaf tip #67, a piping bag fitted with a coupler,
and 1/2 cup of leafy green ( your favorite green, I used moss green ) slightly thinned buttercream.

Start with #2 tip and fill with bag with icing.
Pipe a curlyQ vine on the ball. (This is where you can cover any cracks if necessary)

Change to leaf tip #67, and pipe a one or two leaves from the center top. 

Then, with #4 pipe the stem in the center.  


If you want to display them on Hay Bales, then make some Rice Krispie Treats.
Directions for hay bales are HERE!
That's all there is to it!

Punkins for sale!


Thursday, May 14, 2020

DELICIOUS MINI KEY LIME TARTS


These 2" tarts are made with key lime filling over a pecan shortbread cookie, they are topped with fresh blueberries and strawberries, and drizzled with grenadine syrup.

Start by making the pecan shortbread (I used *Norpro mini cheesecake pan with removable bottoms.) After popping the cookies into the oven, make key lime filling.

After both are cooled, just put the chilled filling into a pastry bag and pipe it onto cookie, top with fresh fruit.

Using strawberries and blueberries made these perfect for a patriotic theme. But they would also taste terrific topped with tart pie cherries, peaches, or raspberries.


MINI KEY LIME TARTS ON PECAN SHORTBREAD CRUST

Ingredients:

Pecan Shortbread
Key Lime Filling
Strawberries
Blueberries
Grenadine Syrup

Pecan Shortbread:

1/2 cup + 2T. softened butter (10 Tbsp)
1/4 cup packed light brown sugar
1/8 tsp Caramel extract (opt)
1-1/4 cups sifted flour
2/3 cup pecans, finely ground

Cream butter and sugar together; add caramel extract (opt). Mix in flour and pecans. Chill dough for about 15 minutes for easier handling. Divide into 24 balls and press into the bottoms of an ungreased *mini tart pan. Bake at 325 degrees for 20 minutes. Remove from oven and cool completely.

Key Lime Filling

1/2 cup *Nellie and Joe's Key lime juice
1 Tbsp cornstarch
6 egg yolks, all albumen removed
3/4 cup sugar
1/4 cup chilled butter, cut into small pieces
8 oz. softened cream cheese

Blend key lime juice together with cornstarch. Pour into a sauce pan; whisk in egg yolks and sugar. Add butter and cook over medium low heat, stirring constantly until translucent and mixture holds its shape when stirred.
Press through a sieve into a bowl; cover key lime curd with plastic wrap, chilling thoroughly.

With a mixer, whip cream cheese; add key lime curd and blend together completely.

Place Key Lime filling in a pastry bag with a fluted tip. With shortbread still in pan, pipe filling over each cookie. Chill well; then lift out of cheesecake pan and remove the pan bottoms.

Arrange sliced strawberries and blueberries on the top of each tart, and drizzle with grenadine syrup.  (Pomegranate syrup works well too.)


Makes 2 dozen- 2" tarts.

*Links for Specialty Products listed in this recipe:
NorPro Mini Cheesecake Pan
Nellie and Joe's Key Lime Juice
Caramel Flavor


Recipe and Photography by
Jacque Benson- all rights reserved 2008

Monday, March 9, 2020

Bunny-licious!


I just wanted to share a very quick and cute way to have fun
on a sweet Easter Sunday!  
Just so you know how fast this project is, I sent my
husband out to pick up grilled chicken a few miles away,
and by the time he was back home,
 the chocolate egg was out of the mold, the bunny was
finished and salads were made!  

Here's what you will need. 

White Chocolate fondant :
2" ball of white
1" ball of electric yellow
1" ball of neon pink
1" ball of neon green

1/2 cup white chocolate melts
 A few Pastels
Shortening for rolling out fondant
Malted Milk eggs or favorite candy


Tools:

Toothpick
gum glue
Paintbrush
Fondant Roller
Fondant Board
Blossom Cutters
Leaf Cutter 
Blue or Black edible pen
Cotton gloves for handling chocolate

Start by rubbing your fondant board lightly with shortening.

Roll two very small balls, 3/8" and 1/4".


Press flat into mold, as shown.


Roll out pink fondant on lightly greased board. Cut two small blossoms, using your cutters.

Place over yellow centers in mold. Gently press the petals into the mold.
When you turn it over, it should look like this.

Roll a narrow green cord about 4" long from the green fondant.


Cut in half and press into back of flower, then shape into stems, pressing the stems gently into the mold.

Roll out green on lightly greased board and cut a leaf.
 Place on stem, gently pressing into the mold.


When turned over, it should look like this.
 Set aside.

In the microwave, melt the white chocolate in a heat safe measuring cup, for about 2 minutes at med power.
Remove from microwave, and stir until chocolate is melted and smooth.


Spoon
into molds, tilting to coat the sides,

continuing to rotate the mold
slightly to cover the sides with a nice thick layer of chocolate.

 If
some spills over the edge, just scrape off with the flat side of a
spatula.

Place in the freezer. 

While the chocolate is in the freezer, 
Divide the white chocolate fondant into two equal pieces. 
Form one into an oblong shape slightly larger on one side,

as shown below.

Clip the sides to create arms, and clip 1/2" into the center of the bottom to create legs,
 as shown below.
 

Gently roll the arms and legs to create a body.
Clip off ends of arms and set those pieces aside for later use.

Make feet and hands by shaping the arm/leg ends of the fondant.
Place the body in a sitting position and set aside.

Take the second ball of white fondant and make another oblong shape, 
as shown below.

 Clip the center of the narrow edge, as shown to create ears

Flatten the ears.

Roll out a small amount of pink and place in the center of the ears.
Attach with gum glue, if necessary.


Break a toothpick in half and place into body, with a portion extending above the neckline.
Moisten bottom of head with gum glue and push into the toothpick to secure to the body.

Add pink to the bottoms of the feet, (as shown below)

 and buttons on the front of bunny, if desired.

Roll out two tiny balls with the reserved white fondant, and a smaller pink ball. 
Attach to the face to create the bunny's nose and mouth.
And don't forget to save a little white for a tail!
Using an edible pen, make two dots for eyes.

Reheat
the leftover chocolate in the measuring cup

.(being careful not to burn
it, 30 seconds, med power should be plenty, but keep a watchful eye)
Okay,
now using the artist brush, dip into chocolate

and brush a little onto
on side of the pastels to attach to the bunny.

 We don't want our Easter
Bunny empty handed! 

If you cannot find pastels, just  use 1/4" edible pearls, candies or rolled fondant. 
Okay, Bunny is finished!!


The chocolate eggs should be set up.
Remove from freezer and set right side up.

Allow the eggs and base to loosen.
They should fall right out of the mold.
How cute is that?

Use cotton gloves to prevent fingerprints.
Turn the flat sided egg upright and fill it with candy.

Gently brush melted chocolate along the edge of the egg,

then afix the decorated side of
the egg on top.  

Brush a little melted chocolate over the seam,

then add the butterflies to cover the seam.


Brush a little chocolate on the top of the base, then set the egg on top of the base.
Place the bunny on top of the egg.

And add a little butterfly to his foot, just because it's spring!


There you go...
Peter Cottontail with lots of sweet treats!

  Happy Easter!


Tutorial and Photography by Jacque Benson
                                                                2014 all rights reserved.

This tutorial and material on this website cannot be republished without permission from the author.

"God gave us our memories so that we might have roses in December." ~J M Barrie